www.mullarea.com
DIY Triple Wide Flexy Rack for 9 components, with many thanks to TNT-Audio.com
Materials Used - 1) 4'x 8'x ¾" plywood sheet |
Stuff you will need or wish you had - A power drill |
Hints & Tips - Have Lowe's/Home Depot/Lumber Yard cut the plywood unless you own a table saw and have the room to play with a 4x8 sheet of plywood. MEASURE TWICE (or three times) before cutting or drilling as it is almost impossible to move a hole once it is drilled. By the same token, stretching a board that is too short is also very difficult! When using a spade bit to drill the holes, do NOT drill all the way through the wood on one pass, let the point of the spade bit penetrate the opposite side of the wood, flip the wood over and complete the hole. Hardware stores are sorely lacking when it comes to washers in larger diameters, so be aware of online resources such as McMaster Carr and use them. Hardware is not cheap any more, in fact it is ridiculously expensive. Buy in bulk to save money, even if it means you will have extra pieces. Better 10 too many washers than one too few. Patience is a virtue. Do all your wood working and finishing (staining, trim work, etc) before you assemble the rack. Stain/paint takes time to dry and the amount of time is dependent on temperature and humidity. If it is cool and damp, this will mean a longer drying time and you don't want to rush this part. If that means this is now a two weekend project instead of a one weekend project, live with it. Stained and finished properly, this rack will look great for a lifetime. That's worth the time it takes to let pieces dry. |
Addendum - I strongly prefer the original flexy-rack "tripod" design. When going with multiple verticle stacks, they support one another very nicely and are infinitely expandable ( a double wide can easily become a triple wide, which can become a quad wide, etc., etc.). This strikes me as an excellent excuse/reason to buy more equipment ;) Plan ahead. Draw your plans up in whatever graphics software you have (even MS Paint will do) and then draw them up again. And again. And again. Time spent playing in Photoshop will pay off when it comes time to build, as by now you will have a very good vision of exactly what it is you want to build (see: Patience - virtue) Take pictures of your work in progress and the finished product. Other people want to see your ideas made into reality. Web pages of DIY projects are a great goodness. You may give someone an idea; you may inspire them to try it for themself. This is a worthy thing to do. |
Pictures - Click on any image to embiggen.
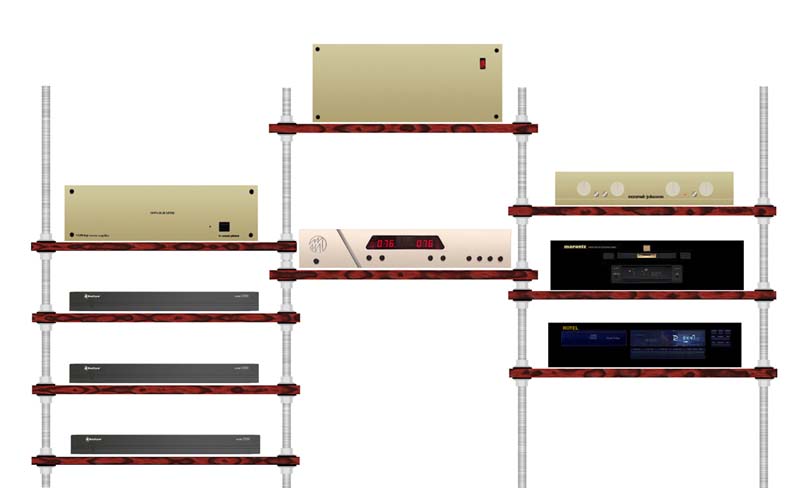
The project is drawn out to scale using a graphics editor program such as photoshop
An illustration of the wood layout, drill points and how the threaded rod is secured
A pair of wood shelves before and after a coat of varnish
Sun dried shelves, almost as good as Roma Tomatoes
More shelves baking in the sun
Test fitting a shelf, checking for level (observe acorn nuts as feet)
Beginning assembly of completed shelves with edge trim attached
Assembly of right side set of shelves
Adding a center shelf which ties entire unit together
Another image of the lower center shelf added
All shelves in place, acorn nuts used to cover the upper end of the threaded rods
Another shot of the completed flexy rack assembly
Checking for level - be sure to check left to right and back to front
Adding the goodies
Connecting inputs and output and so on and so forth
All hooked up and running, with a LOT of exposed wiring, which leads to my next project....
After looking at the wires for about a year, I went back to the hardware store and built the